
Jordan Estrada 09.09.21

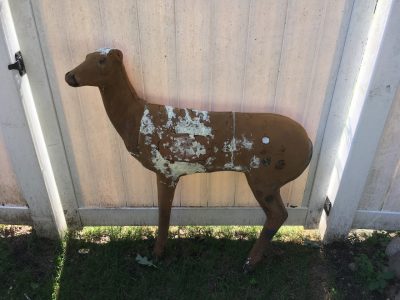
When I met Bambi at a local thrift shop, he was not in great shape. Any foam 3D animal target is going to absorb a certain amount of damage, but Bambi had been through the war. In addition to the regular scattering of self-healed holes from target pointed arrows, Bambi had tons of slices, nicks, and cross patterns from a previous owner who had practiced with broadheads. Whole chunks of foam had been carved out:
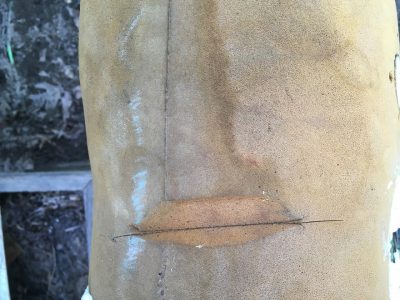
It also appeared his previous owner had used him as a firearm target, as there were a number of small, neat holes that looked different than regular arrow marks.
I even found what appeared to be a .50 cal blackpowder slug deeply embedded in the foam. I didn’t try to remove it because, as any Civil War field surgeon will tell you, sometimes removing the ball causes more damage than leaving it in.
Having endured sustained fire around his midsection, Bambi was almost severed in half; the foam around the vitals area and vital insert retaining little structural support. When I picked him up to move him, the two halves threatened to separate.
However, he was on sale for $20 — the exact amount Macklemore recommends for popping tags in thrift stores. Brand new 3D animal targets start at $100 and can cost into the hundreds of dollars, so I thought “What the heck?” Why not try to refurbish him?
Foam Bambi became the next in a long line of deer to take a ride in the back of my car.
My first step was to secure Bambi’s two halves together with wire — even moving him around risked breaking him completely in two. I then used a knife to trim away pieces of foam that were dangling and breaking off and which I doubted I could re-attach. I removed the center insert section, as I planned to work on each section separately. Then I followed these steps to repair my newly acquired target:
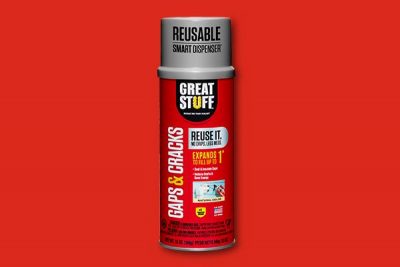
1. Fill all holes, gaps, and cracks with Spray Foam Insulation
That yellow, expanding stuff from Home Depot:
There are two things I was hoping the spray foam would accomplish. First, it’s a filler — it would plug all those gaps and cracks. But more importantly, it’s an adhesive. Spray Foam securely bonds with whatever it touches, and I was counting on this property to help restore Bambi’s structural integrity.
If you’ve ever used spray foam insulation, you know it is ridiculously effective and completely messy. I recommend wearing rubber gloves, unless you plan to use up all of your (or your wife or girlfriend’s) nail polish remover afterwards.
Bambi had some large, cratered wounds, and home improvement stores DO sell a type of spray foam insulation marketed as a “big gap filler.” I just used the regular kind, and it can work to fill big gaps if you apply it in layers:
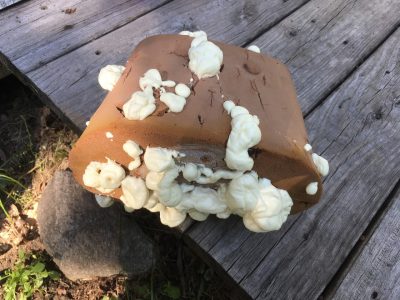
Eventually, I had all the major damage filled in:

As you can see, expanding foam sure likes to expand. That was fine — I’d take care of that later. At this point it was time to let the deer sit overnight and let the foam cure.
2. Cut away Excess Foam Expansion
After the foam had fully cured, it was time to trim away the excess. My goal was to cut the foam so that it matched the contours of the target’s body:
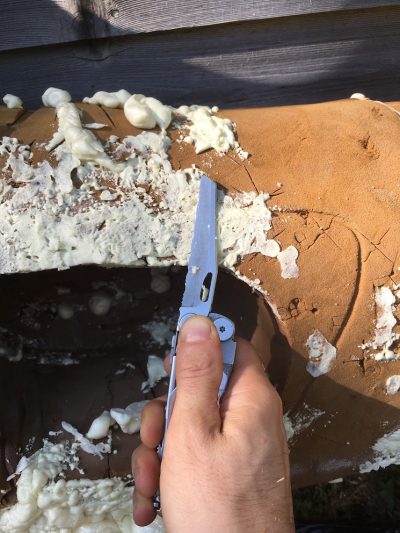
It’s important to do this over a tarp or bag since all those foam shavings aren’t great for the environment and are really hard to clean out of the lawn:
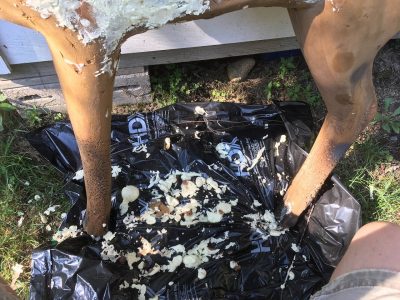
After 30 minutes of surgery, Bambi’s liposuction procedure seemed effective:
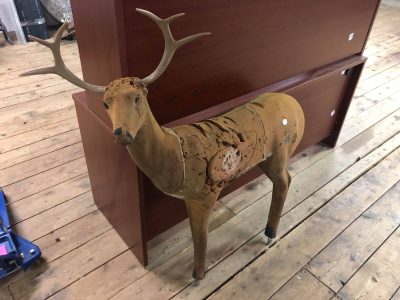
At this point, the main work was done, and I could test the target to see if my repairs were effective. However, I had some cosmetic ideas in mind, since I was going to have to look at this target in my backyard every day, and Halloween isn’t for another two months.
3. Paint and Finish
I wanted to add some paint to hide the damage and help Bambi blend into my backyard aesthetic. Back at Home Depot, I found a can of Krylon “Otter Brown” spray paint that seemed deer colored. As a general rule, you can’t spray paint foam, since the chemicals and propellents in spray paint can melt and corrode many types of foam. The recommended procedure for painting foam is to either obtain a rare water-based spray paint, or use a brush and apply latex paint by hand.
However, I was in a hurry and just wanted to touch up the repaired spots, so I thought I’d try the Krylon. First, I tested the spray paint on a spot on Bambi’s leg and found that the paint didn’t damage whatever heavy-duty foam Bambi was originally manufactured from. Next, I put a heavy coat of spray-paint on some scraps of spray foam insulation, and this did cause some damage — a heavy application of spray paint moderately corroded the foam insulation.
However, through a little experimentation, I found that a light air brushing — applied from a distance to allow the propellant to dissipate — did not cause any noticeable harm. So that’s what I did.
Before and After:
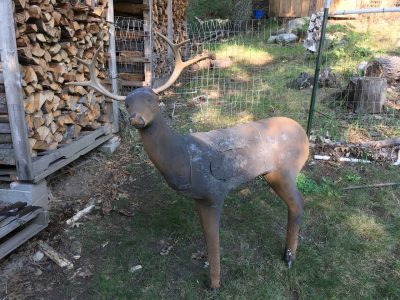
Bambi was looking a lot better. He won’t be winning any beauty contests, and kind of looks like he has chronic wasting disease, but he’s a working deer, not a show deer.
Testing the Finished Product
Bambi had no trouble absorbing fire from my Genesis Compound bow:
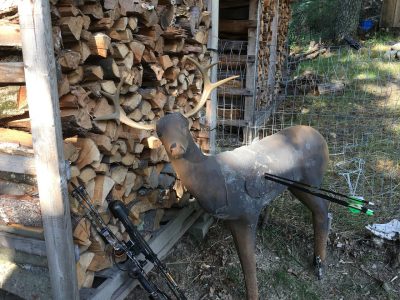
Next, I tried my Excalibur Matrix Crossbow, hitting at 305 FPS with a 200 lb draw weight. Bambi didn’t seem to mind:
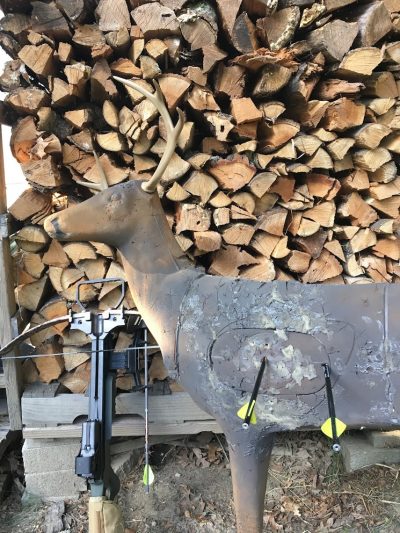
After a dozen shots or so, Bambi seemed none the worse for wear. I did notice that the holes didn’t seem to ‘self heal’ as much as a new target, but this occurred even in spots where I was hitting original untouched foam. Bambi is probably several decades old, and his base foam just isn’t as spongey as it probably was when he was first made.
Overall, I was very happy with the finished product, and will be shooting Bambi regularly as I gear up for Fall Archery season. My repair job should last the season, and since spray foam insulation is cheap, I can touch him up any time he needs it.
