
Morgan Rogue 02.15.22
In all my years of slinging arrows, I’ve never been a fan of the wrist sling. It’s always felt very foreign to me. I’m really old school and we never had those gadgets back in my day. I know how that makes me sound and I don’t care, I’m owning it.
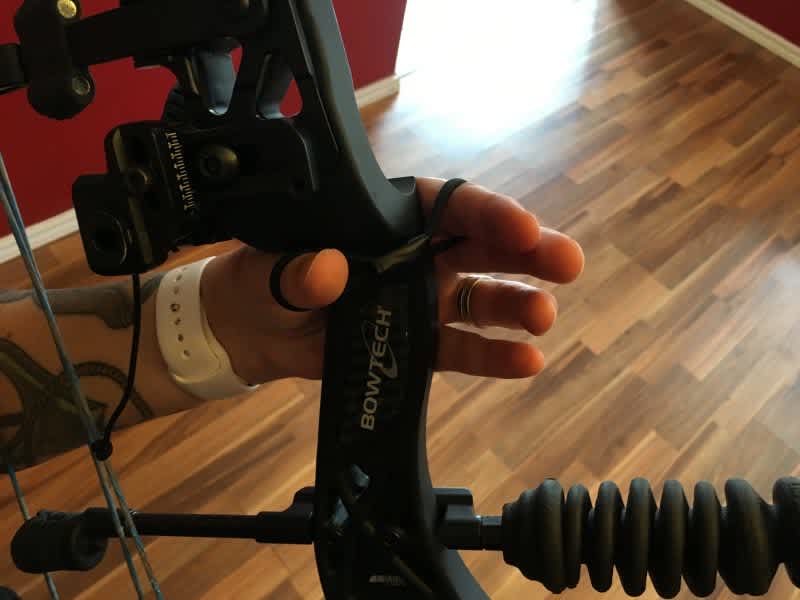
But I understand the purpose of having a wrist sling. Having a sling around your wrist, attached to the bow, allows you to fully let the bow fall, without it actually falling, once the arrow flies. If you don’t allow the bow to fall, you may end up grasping tightly onto the bow and forcing the arrow off-target because of the ever so slight jerk that gripping the bow does to your arrow.
Letting the bow fall allows for proper follow-through and less jerking of the bow.
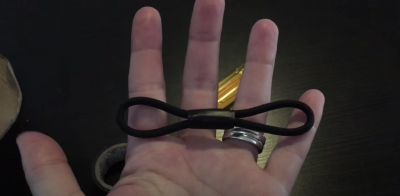
Making a wrist sling is easy, but making a finger sling with the same theory behind it, is even easier! I’m going to show you how to make a finger sling using common household items in a matter of minutes.
Here’s how to make a super easy archery finger sling:
Supplies:
- Paracord or another type of strong cordage of your choice
- Lighter
- Electrical tape or gorilla tape
- Scissors
- Measuring tape
Step 1: Hold your bow and measure from your thumb to index finger since these are the fingers the sling will be on. I’m going to be real with you, when I was experimenting I cut up several pieces of paracord to find the right size. But I did end up measuring the last one I did and it came out great.
Step 2: The measurement will be from one end of the loop to the other end of the loop. Cut a strand of paracord that is twice as long as the measurement.
Step 3: Burn the ends of the paracord with the lighter.
Step 4: Bend the ends of the paracord to make the loops, keep an eye on your measurements from one end of the loop, to the other. You can also burn the ends of the paracord and connect them in the middle, as well, if you so choose.
Step 5: Take your tape and tightly wrap it around the center of the loops.

Step 6: You’re done! Test it out!
Yep, it’s that simple!
It will take some getting used to. Simply getting into the mindset that it’s ok to drop your bow and not try to grab onto it to keep it from falling on the ground, is a bit of a mental hurdle to get around.
Take your time, get used to it and practice consistently. If you ever need to make any adjustments, you can make another one or try to unwrap the tape and simply shorten the middle cordage then re-wrap it. Completely up to you. Because of how easy these are, they can be made multiple times over without breaking a sweat.
Just like with most things, the more you practice, the more it’ll become second nature. Have fun!
